Thank you so much for choosing this mini kit to improve your embroidery practice. In this post you’ll find everything you need to make your project. This project perfectly fits for beginner, but if you have any questions, please feel free to contact me: thecomptoir@gmail.com
First step : put the fabric inside the hoop
One of the most important secret to have the best result in embroidery is to set up your hoop. You need to have the right amount of tension on your fabric. For all your projects it’s important to have your fabric very tight all the time. So think about checking the tension often.

Your first thought might be to loosen the screw on the outer hoop and then you can
separate the two pieces of the hoop.
Place the inner hoop on a flat surface and lay the fabric face up over the hoop (a). Place
the outer hoop over it and use both hands to press it down onto the inner hoop (b). The
tension of the fabric should already feel fairly tight. You can now tighten the screw (c) and
finish to gently tight the fabric using both hands: one to hold the two hoops together,
one to pull the fabric (d). You will know that your fabric is tight enough when it makes a
drum sound (e).
Second step : trace your design
You can draw a design on a paper or print any design from internet. Then you can transfer it on you fabric. You can do the same as what I did in the picture.

You can use pencils, permanent fabric markers or regular markers to trace your design. On the pictures, I am using a Frixion pen, that you can erase with an iron or a hair dryer, for this kind of projects, it’s the best. I recommend to trace your design on the back side of your fabric.
Third step : let’s make your embroidery
The kit you have is to make a free project. You can choose the design you want, I am just going to show you some examples and explain few stitches.
- Satin stitch

If you want to make the same as shown on the picture above, you are going to use the satin stitch. The satin stitch is very useful if you want to quickly fill an area but also to make big letters or any kind of shapes. You can cut a arm long section of thread and make a knot at one of the end of it. Then you can thread your needle (explanation following). You can now start to make your embroidery. Start from the beginning by making a tiny stitch, then you can make a parallel a little bit bigger stitch, and again and again, to follow your traced design.
step one 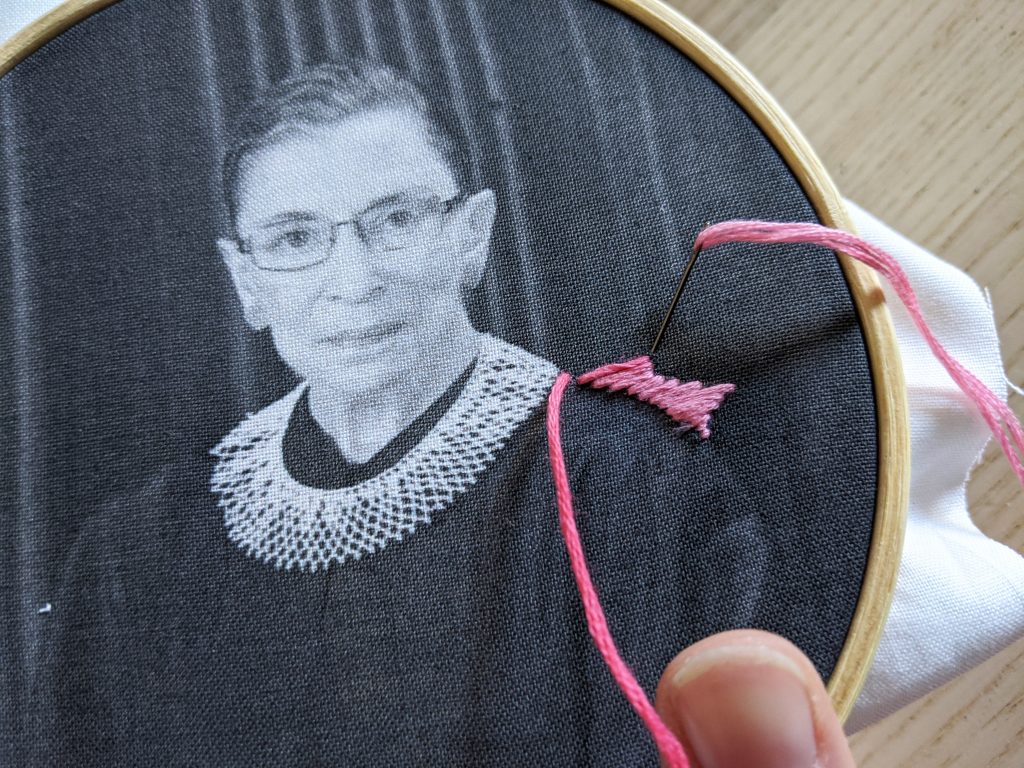
step two 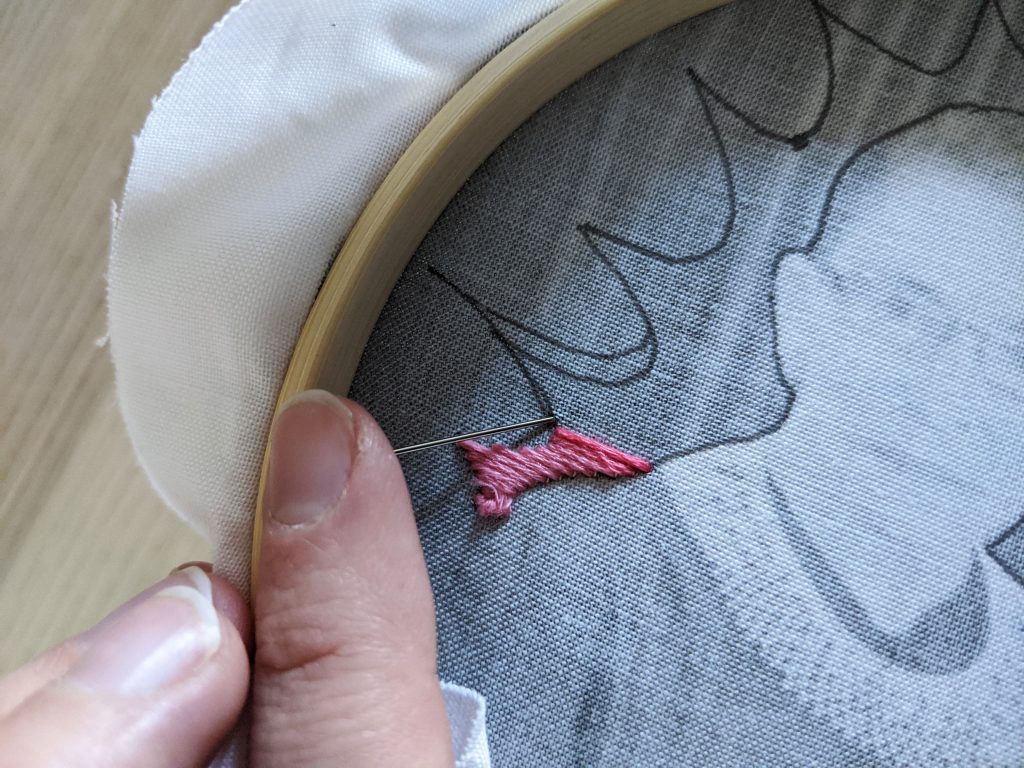
step three

- Back stitch

You can use this stitch for writings, but also to make outer lines for example. For writings, I recommend to use a half floss (so 3 threads). But feel free to try embroidering with less or more threads!
This stitch is great to make neat lines and it is so easy! Let’s start with her collar. Go up on your line, but not on the very beginning of it (a). Go down before, or backward, at the beginning of your line (b). Then go up after your first stitch.

You can finish your second stitch and go down on this very same hole (c). Now, you can just repeat it to finish the line.
- Brich Stitch

A brick stitch is like making raws of back stitch lines. The only important
The Brick Stitch is a way to fill areas, just as the Satin Stitch. The Satin stitch is faster but the Brick stitch looks fancier. Making a brick stitch is like building a brick wall, it’s all about rows.
If you want to fill a big surface, your stitch can be 1, 2 inches long and even more. There are two ways to make Brick stitch: vertically or horizontally. Here, we are going to make a horizontal Brick Stitch.

A horizontal Brick stitch is like a succession of back stitches in rows. You can start by making a first back stitch line. Once the first line is made, you can make a U turn to make the second line, be sure that your stitches between the first and the second line are in a staggered arrangement just like a brick wall.

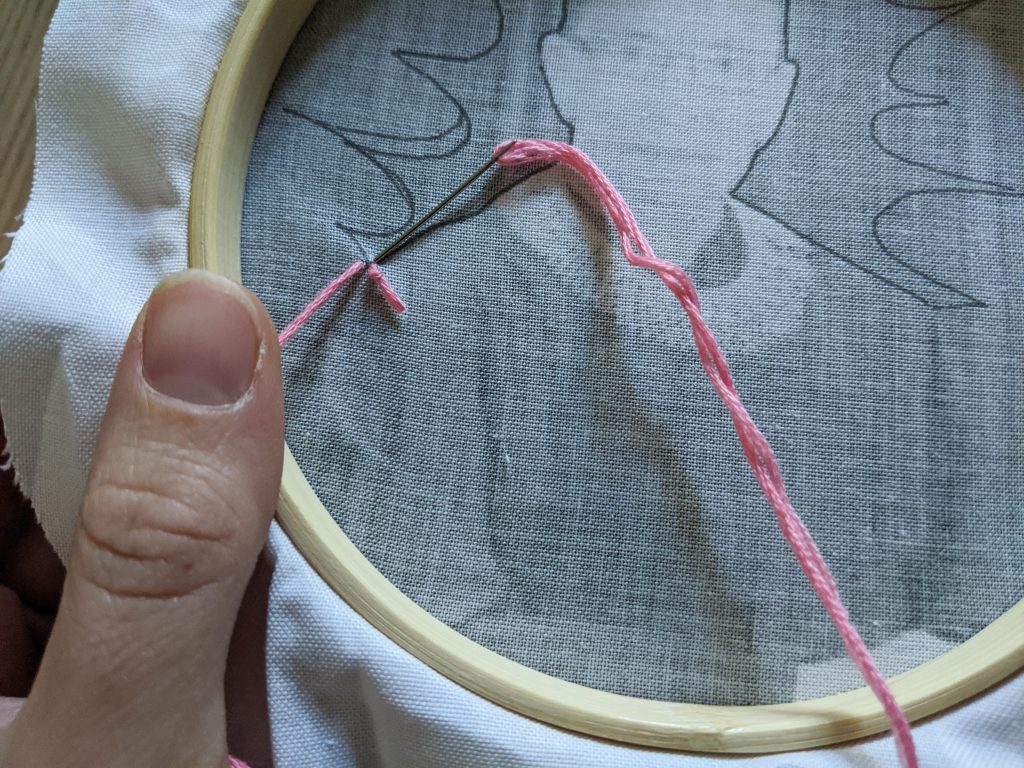
- French Knot

This stitch is one of my favorite! Be patient, it’s going to take time but it’s going to be beautiful. Feel free to make different sizes of French knots.
Let’s start to make our first French knot. Thread your needle and make a knot at the end of the long tail, as usual. Pass your threaded needle through the fabric from back to front. The key for a successful French knot is keeping your embroidery floss tight while working. To create your French knot, you should use your two hands. One for the needle and the second one to hold the floss tight while holding the embroidery hoop, as you can see on pictures (a).

To start to make your first French knot, wrap the floss around the needle once (b) or twice, and keep the floss tight. Push your needle, perpendicular to the floss and close to the fabric (c). While holding the floss tightly, pick a point as close as possible to your original starting point (d) without using the same hole.

Pull the needle all the way back through your fabric, and slowly pull through the remaining floss (e). You made your first French knot and as you can see, you can make different sizes of French knots (f)!

Threading a needle
One of the most complicated things to do when you want to learn embroidering is to thread a needle. It maybe sounds silly but it’s not.
First you need to learn about embroidery floss.

Once you choose the number of threads you want to work with, you can choose a needle. Embroidery needles
look the same as sewing needle, expect the eye of the needle is bigger and longer.
For my kits I am using DMC embroidery needles. Embroidery needle go from size 1 (big) to size to this 10 (small).
For my kits I choose size 5 (medium). Whit this needle, you can choose to work with 1, 3 or 6 threads. Threading
a size 5 needle with 6 threads is not easy, but if you have the right technic you can do it.
When you are hand sewing, you push the thread through the eye of the needle. With an embroidery needle, it’s not the same. You are going to push the eye of the needle on the floss.
First, cut an arm long section of floss. With very sharp cissors, cut one of the two tails to cut all fluffy tiny threads. Then between the top of your thumb and of your index finger make the floss flat. Now you can push your needle on it.
If you need to see a demo, please go take a look to my Instagram @TheComptoir. On my highlights stories there is one called «Embroidery tips». There you are going to find many videos to show you how to thread a needle and how to make some stitches.
Finishing

To finish it, first tighten your fabric. Then, you can glue your fabric to the inner hoop (a), with your glue gun, or any other kind of glue. Then fold the fabric on the glue (b). It should look like the picture c.
When it’s dry, you can cut all excess fabric (d) from around your hoop with scissors, leaving about a 1/4 inch of cloth.

If you want to cover the back of your embroidery with paper or felt, first glue all around the inner hoop (e) and put a paper on it. But you can also leave it as it is (f). You just finished your embroidery project!
Done!
Yes!! You did it! You should be proud of your creation and you should share it with all your crafty friends!

Please share your works in progress and finished pieces via Instagram or Facebook with tags #TheComptoirPattern & #DIYTheComptoir