For any questions, please feel free to send me an email: thecomptoir@gmail.com
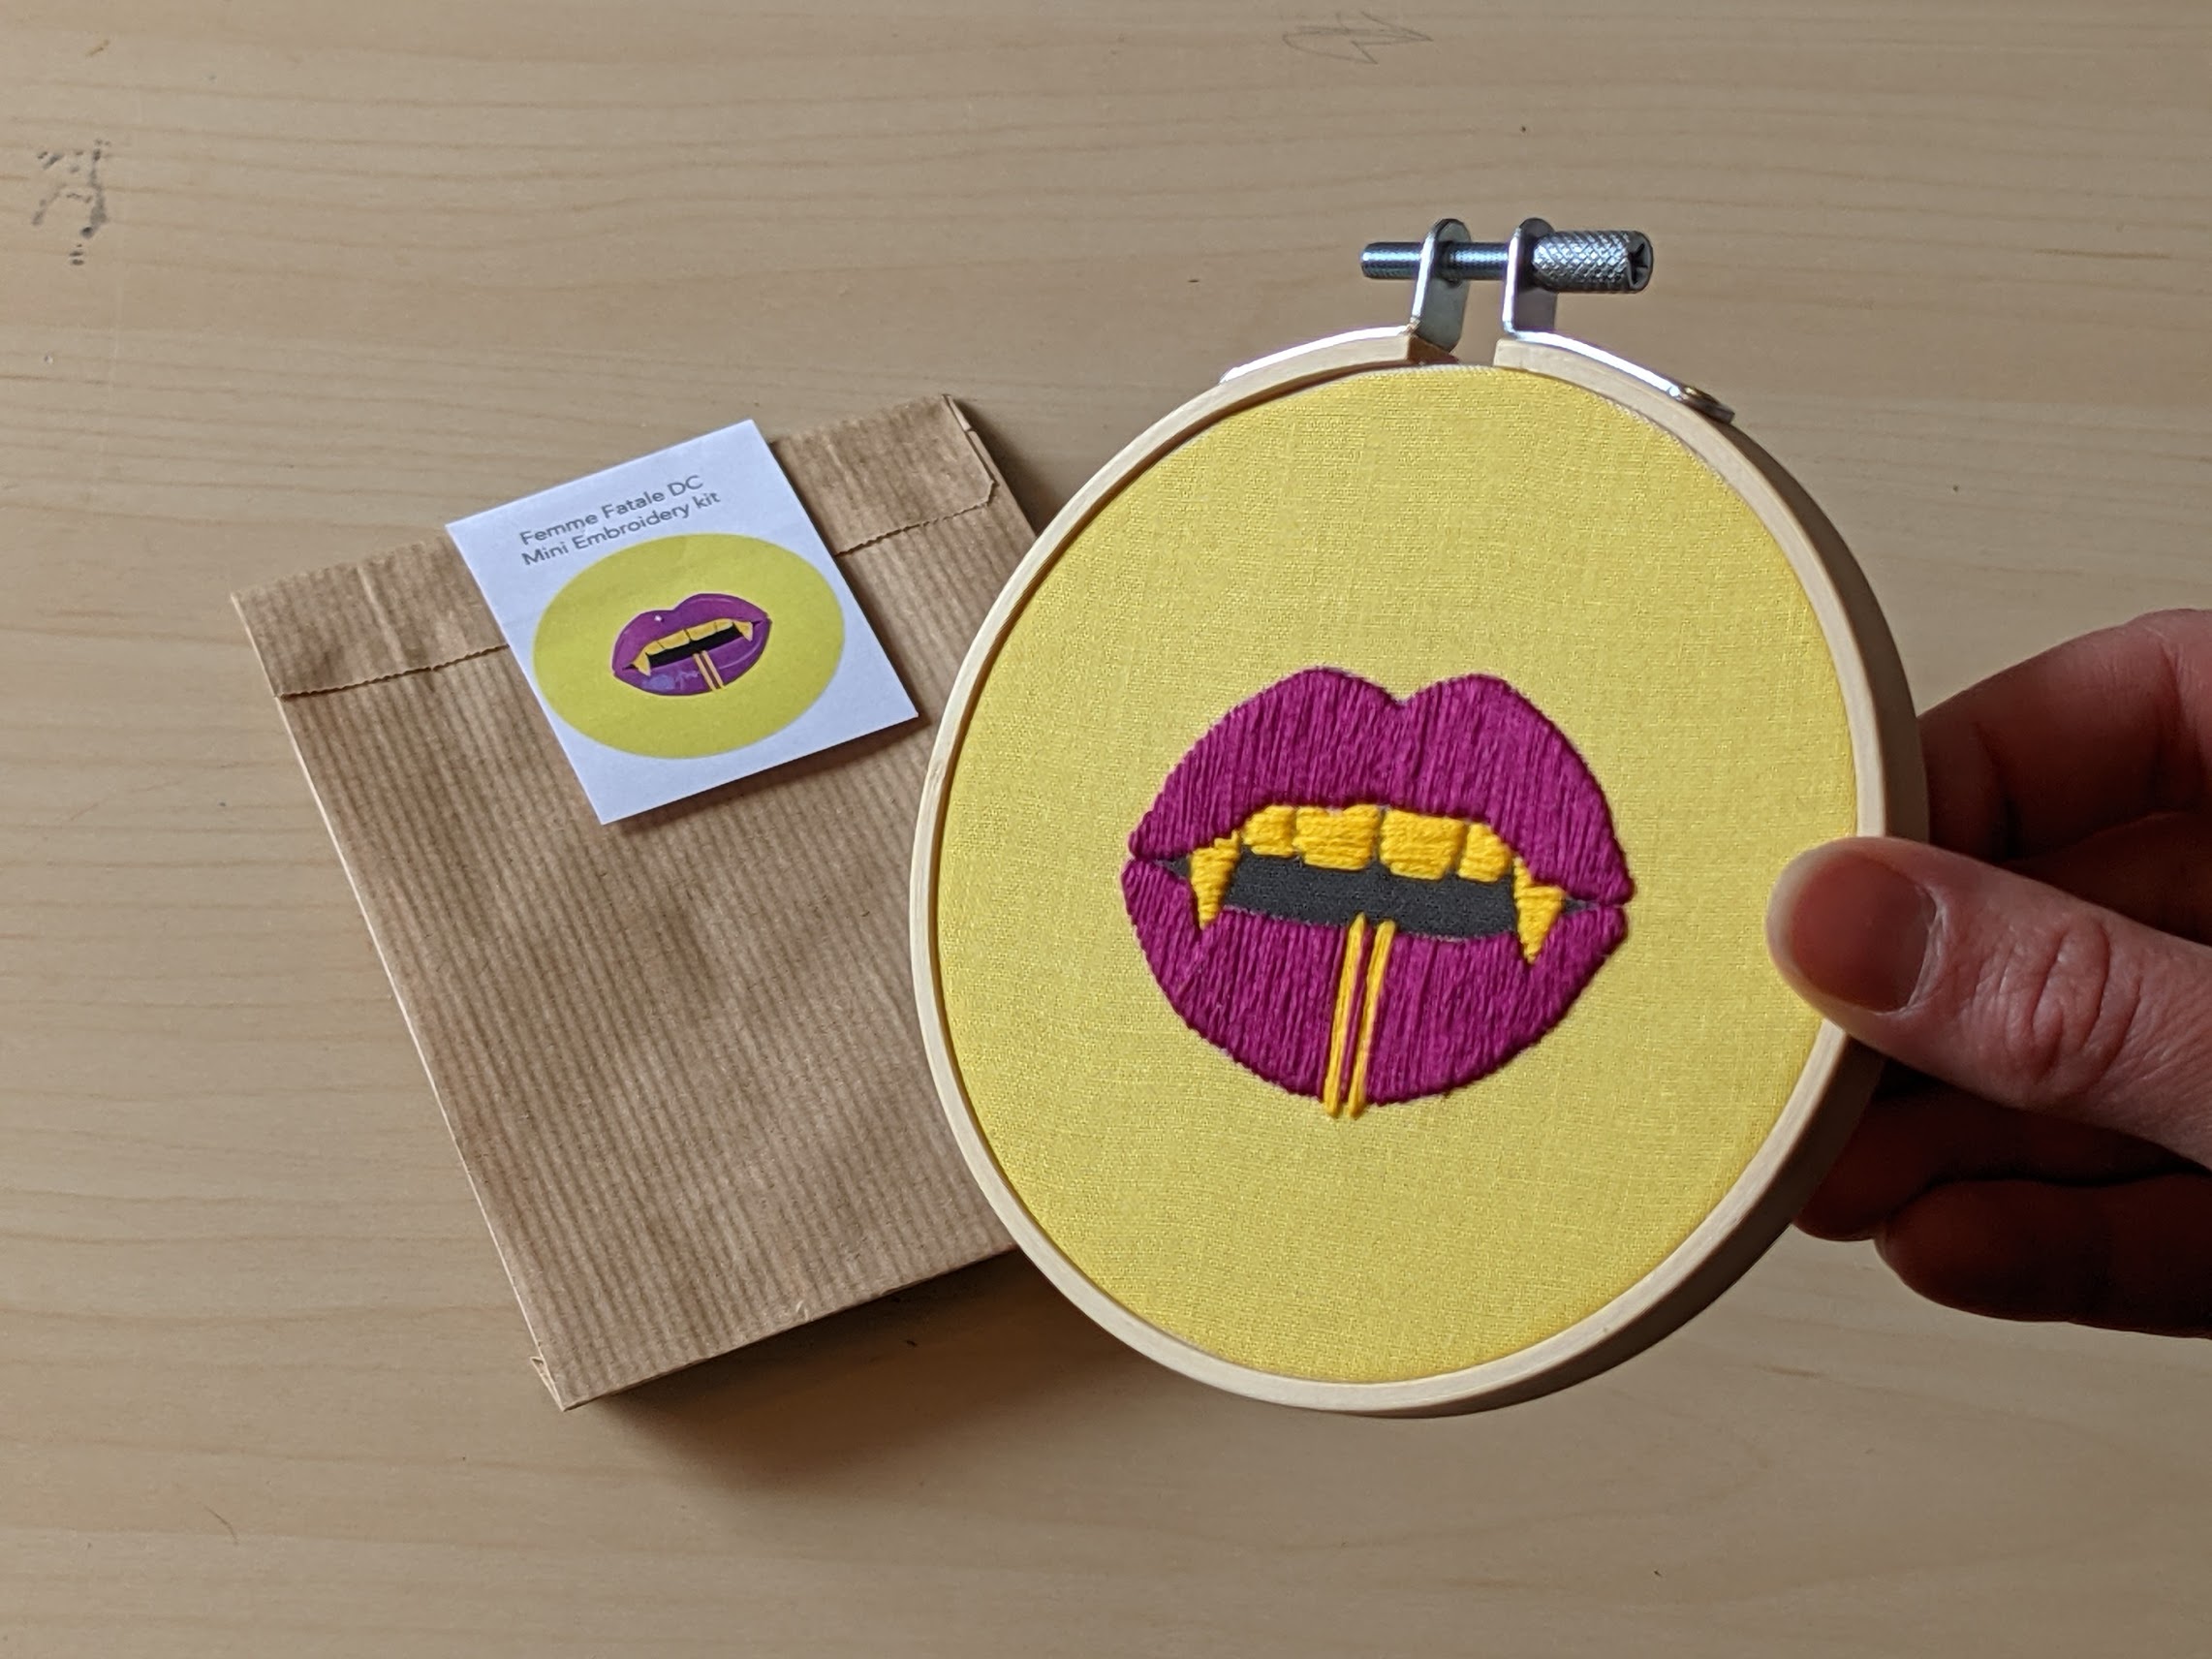
Welcome to this tutorial, here, you are going to find all explanation to create this cute embroidery made after the Femme Fatale Dc logo. To learn more about FFDC please visit their website here.

To learn how to make the satin stitch I used for this project, please take a look to the video tutorial.
First step : put the fabric inside the hoop
One of the most important secret to have the best result in embroidery is to set up your hoop. You need to have the right amount of tension on your fabric. For all your projects it’s important to have your fabric very tight all the time. So think about checking the tension often.
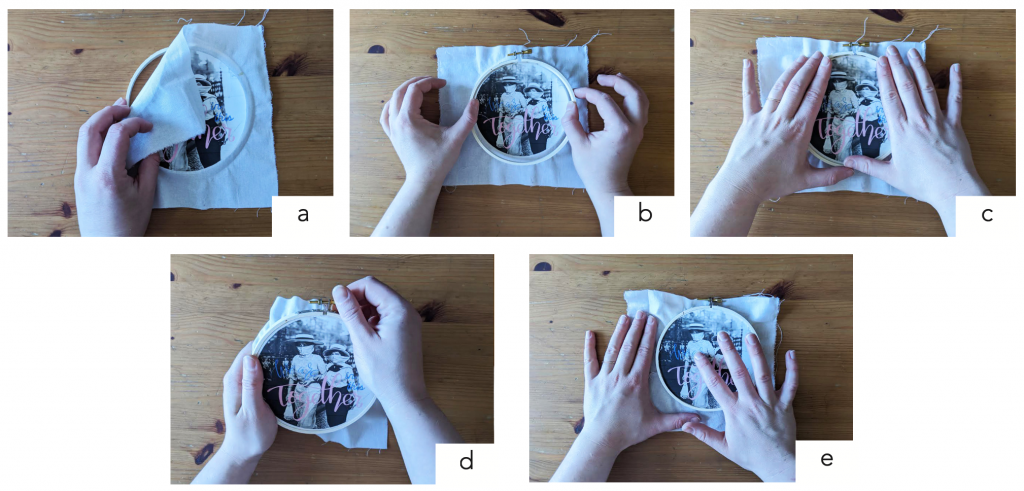
Your first thought might be to loosen the screw on the outer hoop and then you can separate the two pieces of the hoop.
Place the inner hoop on a flat surface and lay the fabric face up over the hoop (a). Place the outer hoop over it and use both hands to press it down onto the inner hoop (b). The tension of the fabric should already feel fairly tight. You can now tighten the screw (c) and finish to gently tight the fabric using both hands: one to hold the two hoops together, one to pull the fabric (d). You will know that your fabric is tight enough when it makes a drum sound (e).
Threading a needle
One of the most complicated things to do when you want to learn embroidering is to thread a needle. It maybe sounds silly but it’s not.
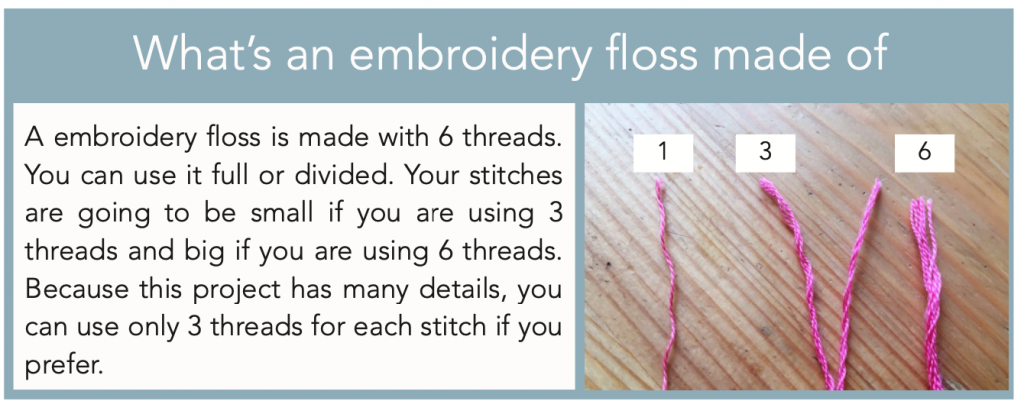
First you need to learn about embroidery floss.
Once you choose the number of threads you want to work with, you can choose a needle. Embroidery needles look the same as sewing needle, expect the eye of the needle is bigger and longer.
For my kits I am using DMC embroidery needles. Embroidery needle go from size 1 (big) to size to this 10 (small). For my kits I choose size 5 (medium). Whit this needle, you can choose to work with 1, 3 or 6 threads. Threading a size 5 needle with 6 threads is not easy, but if you have the right technic you can do it.
When you are hand sewing, you push the thread through the eye of the needle. With an embroidery needle, it’s not the same. You are going to push the eye of the needle on the floss.
First, cut an arm long section of floss. With very sharp cissors, cut one of the two tails to cut all fluffy tiny threads. Then between the top of your thumb and of your index finger make the floss flat. Now you can push your needle on it.
If you need to see a demo, please go take a look to my Instagram @TheComptoir. On my highlights stories there is one called «Embroidery tips». There you are going to find many videos to show you how to thread a needle and how to make some stitches.
Finishing
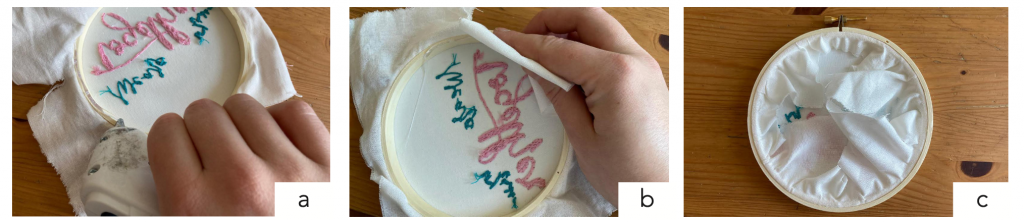
To finish it, first tighten your fabric. Then, you can glue your fabric to the inner hoop (a), with your glue gun, or any other kind of glue. Then fold the fabric on the glue (b). It should look like the picture c.
When it’s dry, you can cut all excess fabric (d) from around your hoop with scissors, leaving about a 1/4 inch of cloth.
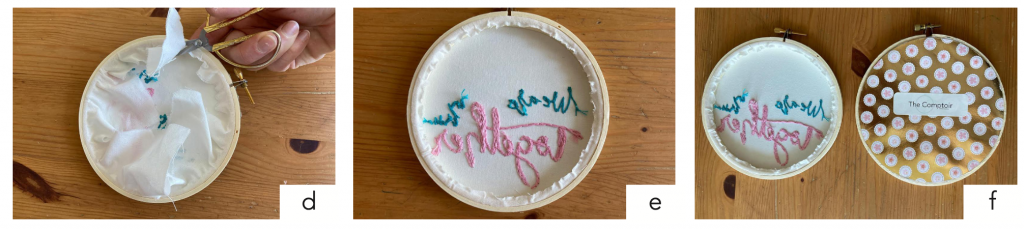
If you want to cover the back of your embroidery with paper or felt, first glue all around the inner hoop (e) and put a paper on it. But you can also leave it as it is (f). You just finished your embroidery project!
Done!
Yes!! You did it! You should be proud of your creation and you should share it with all your crafty friends! Please share your works in progress and finished pieces via Instagram or Facebook with tags #TheComptoirPattern & #DIYTheComptoir
